

Grass Whispers: An Artist's Guide to Not Mowing it Up

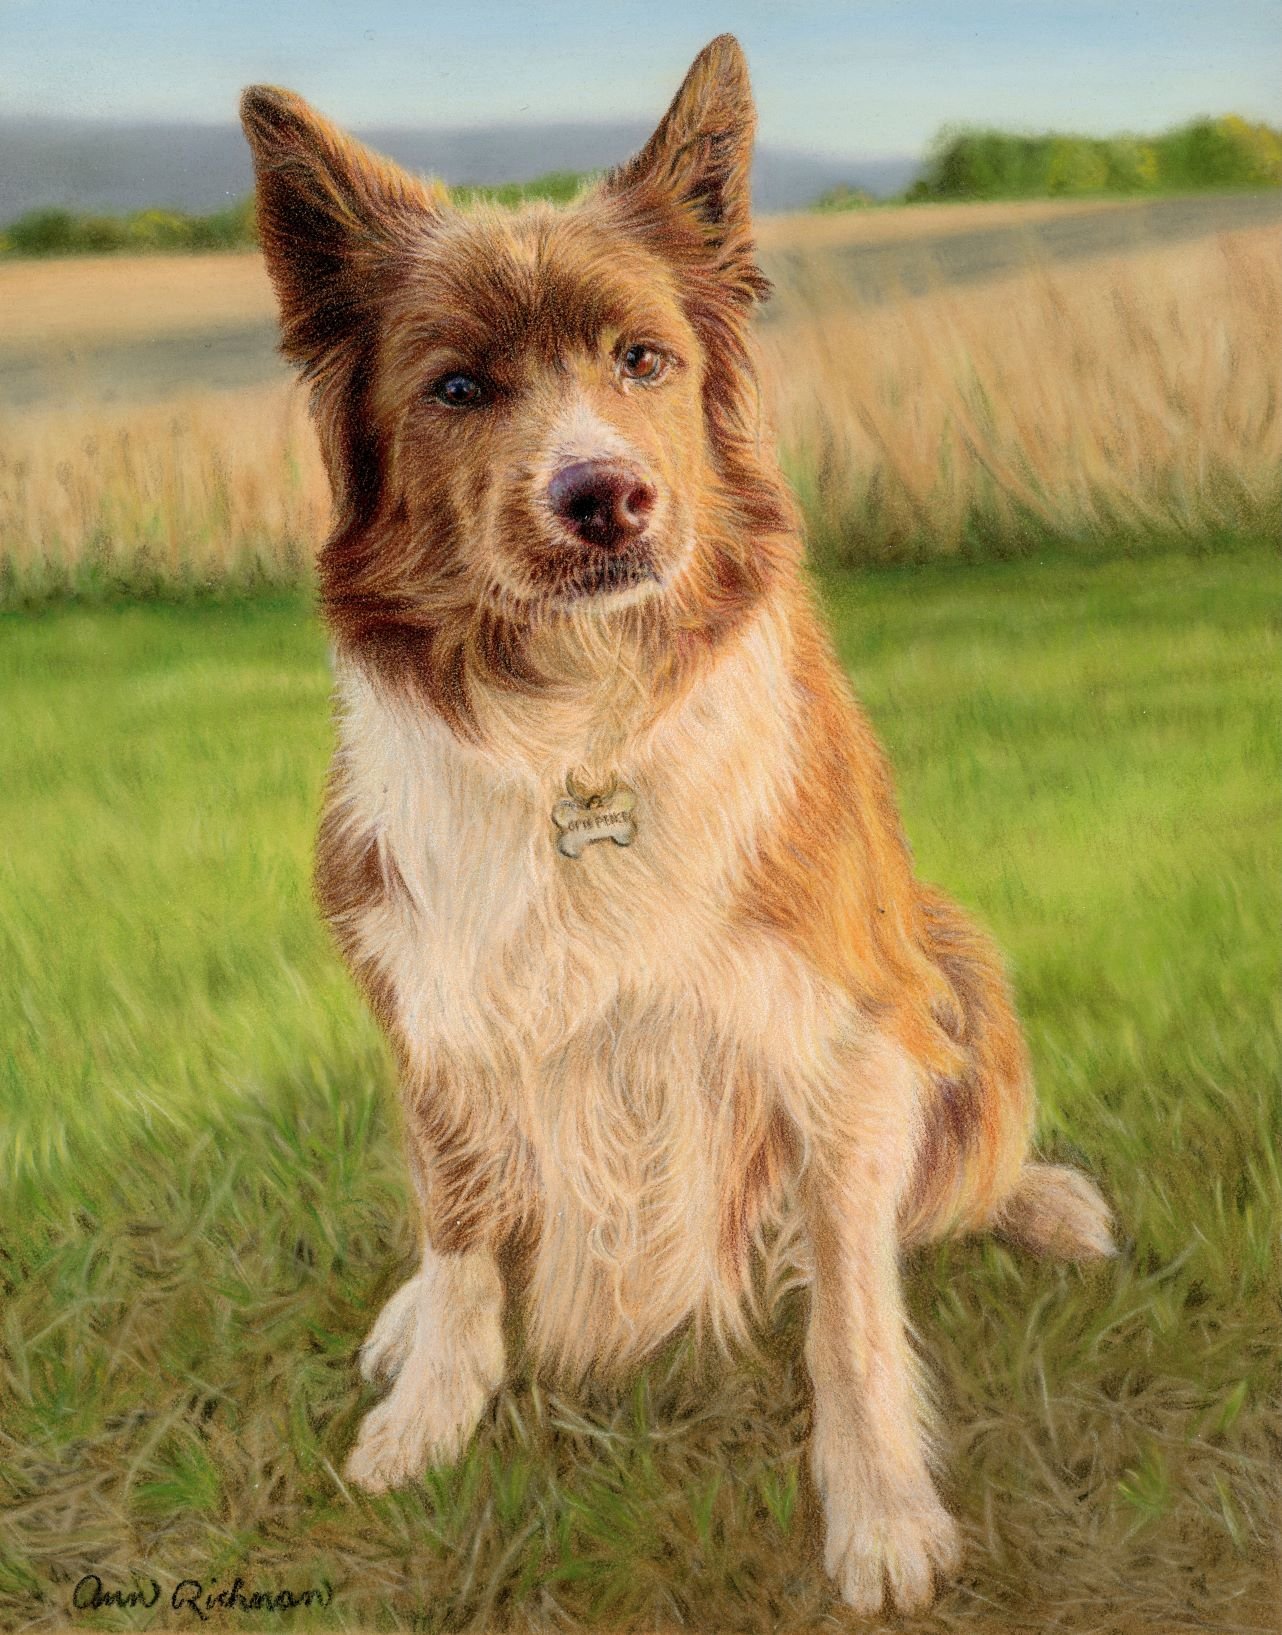
“Nellie” in pastels. This is my latest foray in drawing grass. I think I show some improvement from the pieces I discuss below, but you decide :)
Whether you draw pet portraits or landscapes, you may run into situations where you want to create a nice, grassy background. Maybe you are like me, and you would rather include a background in your piece instead of applying a wash of complimentary color.
I LOVE backgrounds. I don’t necessarily enjoy drawing them, but I like them because they make my pet portraits look more like paintings. They also help to tell a story about the pet. The setting that the pet is painted in can have a special meaning or help to trigger memories for the owner.
If you are a pet portrait artist and you prefer outside photographs from your patrons like me, this often leads to obtaining reference photographs that include grass.
Sometimes I feel daunted by drawing it. I do not suggest that I am a grass expert (or whisperer!), by any means, but I think I have gotten better at drawing grass over the past few years.
My intention for this post and creating videos on my YouTube channel on this same subject is to help others who don’t know where to start. I remember when I first searched for how to draw grass with colored pencils, I couldn’t find any help.
Both of my YouTube videos on drawing grass are now live.
Part 1 describes some thoughts on drawing the fuzzy parts in the background. In Part 2, I discuss thoughts on drawing the more detailed parts. The videos are not formatted the same way as the blog so that they may complement this article. In this blog, I tackle the discussion differently.
YouTube links:
So, let’s get started. I’ll show you some past drawings and give some tips on how to simplify drawing grass.
Fade Out the Focus Of the Background
This is the easiest way to make your grass rendering easier.
If someone has taken the reference photo by focusing on the subject, this may already be done for you. (If you are the person taking the picture, a tip on how to do this is to use the “portrait” setting on your phone).
I snagged this photograph from a friend who is a photographer (Brady Rauch) when he posted it online. He doesn't know I did this (Hi, Brady, if you are reading this!) I downloaded the photo because the dog’s grandma may want me to draw him for a present for next Christmas, and I think it’s a fantastic photograph.
Because my friend set the camera focus on the puppy, the grass in the background is a beautiful blur. I love this picture for two reasons: I don’t have to draw individual blades of grass and the focus is on the subject, which is the main point of a pet portrait. A third reason is- look how cute he is!
If you get a nice shot like this, it will be much easier to blob down (technical term) some different greens and yellows in the background. Then as you move closer to the foreground, you will just be rendering individual blades of grass for roughly one-fourth of this portrait. And even those blades of grass have a nice blur to them.

Adorable photograph of baby Jax taken by Brady Rauch.
Now- what should you do if you get a photograph that shows more blades of grass?
Blur it out! It will be easier and it will look better. Let’s take a look at one of my earliest attempts at drawing grass with colored pencils so you can learn from my mistakes.

Portrait of Beau, done in colored pencils.
I drew this portrait in the summer of 2020 using Prismacolor Premier colored pencils on Strathmore Colored Pencil Paper, series 400.
There are quite a few things I would do differently now if I were drawing this portrait, but I will focus on the grass. See how I drew a blue sky up top? I did that because I wanted to cut down on the amount of grass I had to draw.
If I were drawing this now I would pop that photograph into Photoshop and put a blur on at least one-third of the reference. The key is to make it more blurry as you get further away. This helps to give the illusion of distance and dimensionality, which will help your drawing to look more realistic.
If you don’t have Photoshop you might be able to do something with free software. I found this free resource from Adobe. You could try this if you don’t pay for a Photoshop subscription: https://www.adobe.com/express/feature/image/blur-background
Or you could squint your eyes and get the gist of the colors. I still do this even though I have an altered photo reference. It helps.
If I were drawing this portrait now, I would probably not draw the brown sticks at the very top of the drawing. I’d continue a nice green blur up to the top because I don’t think the blurred-out sticks would be as aesthetically pleasing.
Then I would focus on the grass blades at the bottom of the drawing as I did before. I remember this one took me forever… and that was with chopping part of it off with a sky. I would do a few other things differently with the detailed grass, but I’ll get into that further below.
Let’s look at one more portrait I did after Beau.

Pheobe aka The White Devil, done in colored pencils.
I’m pretty sure I did this one later in 2020, because I remember drawing it while I was teaching a computer class. Well, not while actually teaching, but during my breaks…
Anyway, look at this photo. It’s great! I was able to pick which picture of Phoebe I wanted to draw out of a few, and I selected this one because of the yellows and greens. It’s fantastic! It’s also very nicely blurred, pretty much the whole photo through. I did not have to draw one blade of grass! Winning!
To render this background I put down several layers of color using Prismacolor Permier and then I burnished them. If you have no idea what I’m talking about with burnishing, check out this blog I wrote on that topic: Mastering the Art of Burnishing
I still like this drawing although I wish I would have pushed my values more, but that’s a different conversation.
2. Choose A Different Background
This is something you can do if you don’t like the background you’ve been given at all: use another photo background you already have or search for another online. There are a bunch of free resources that you can use. Check out this blog if you need some ideas:
10 Reference Photograph Sources For Artists
Then you can superimpose your subject on the new background using Photoshop or free software. Alternatively, you can print copies of both and cut and paste your subject onto the new background. I do that sometimes because it’s easier.
I did that with this picture of Jackson below. Jackson went to the rainbow bridge about 10 years ago so the client only had hard-copy pictures of him. I scanned that in and superimposed him onto a better background.

Just be careful if you do this. Make sure that the lighting is similar- for example- if the sun is coming from the left side of the picture on your subject, it should be doing the same in the new background. Another tip is to use a bit of the same color from the background in your subject, as light is reflected you will see some green on your subject (look at Jackson’s chin for an example). It just helps the piece look more cohesive and like the animal belongs in the setting.
3. Drawing The Detailed Bits Using Pastels
This is where it gets real. I haven’t gotten to where I’m excited to draw the blades of grass, and certainly, many artists do this better than I do, but here is what I know helps the grass to look like grass and not a green picket fence.
“Opie Pence” background done in pastels on Clairefontaine Pastelmat (Opie drawn in Prismacolor Premier colored pencils).
Working in pastels is different than colored pencils. I’d say it’s easier. This portion will discuss using pastels on the up-front portion of grass.
I drew the background for Opie in pastels a few years ago.
The first thing to do is look for clumps of color. Put down a base of the darkest colors you see. This part is key, because, in the drawing above, I didn’t go as dark as I should have, so I had to go back in later and color in more shadows. That’s harder to do, so I recommend going darker in the beginning. Remember you can always add light over dark with pastels.
For the base layer, I have decided I like to use PanPastels. They are more translucent than soft pastels. I like that because it gives me room to experiment. It often takes me a bit of fiddling before I can figure out what looks okay. Soft pastels fill the tooth of the paper quickly and don’t allow me to experiment quite as much.
Next, take a look at the detailed part of the grass in your background and you will notice that it is very nuanced. That’s why it’s so hard to draw. To tackle it you will need the typical values- a highlight, mid-value, and dark value. So choose some colors of varying values. You will also need warm and cool hues of greens and yellows.
I like to use Faber-Castell Pitt pastel pencils and Stabillo Carbothello pencils for this portion. I typically grab six to ten pencils for this part. I use pencils because they don’t fill the tooth of the paper as quickly as soft pastels, and I can fiddle with them for quite a while to get the desired effect. Also, it’s easier to draw a blade of grass with a pencil.
After I have picked out some pencils, I start by adding the darkest blades of grass. I’ll smudge as I go because I don’t want fine lines. I gradually add lighter and lighter blades. Be sure to add warm and cool colors. Especially put cooler colors in the shadowed portions and warmer colors in the sun.
I keep adding different values until I’m happy. It’s a similar process to drawing fur. Grass needs to have the look of having many layers.
Make sure you draw grass blades of all different lengths and thicknesses to avoid the picket fence look. Also, make sure your blades are going in random directions. Sometimes it helps me to find clumps of grass to focus on in my reference photo. That also helps to avoid the vertical line look.
One more thing to consider is that one blade of grass can have multiple colors, based on how the sunlight hits. See if you can render some blades of grass while keeping that in mind, especially on the bits of grass closest to the viewer. I don’t think you have to go crazy with that. A little goes a long way.
Leave out what you don’t want to draw- you get to decide! If there are a bunch of leaves- leave some, or all of them out. Remember you don’t have to draw everything. It’s just the background, and it only needs to provide the illusion of grass.
4. Drawing The Detailed Bits Using Colored Pencils
Next up, is the harder medium, in my opinion. If you are going to draw with colored pencils- I’d highly recommend you use oil-based pencils like Faber-Castell Polychromos on Pastelmat. It is more forgiving and you can get a tad bit of light over dark on it. Below is Jackson’s portrait again which I created with all colored pencils on Pastelmat.

“Jackson” drawn with Polychromos on Pastelmat.
You have to think differently if you draw grass with colored pencils but pick out your colors similar to pastels. Make sure you have a variety of values and temperatures when you pick out the pencils.
With colored pencils, I like to start by mapping the darkest areas first. I use the reference photograph purely as a guide. There is no way I have the patience to map it out exactly. I use it to give me patterns of how that particular grass grows.
Next, add the lighter colors and then you can darken as you go until you’re satisfied.
If you use oil-based pencils and Pastelmat, you can use a dry paintbrush or blending stump to move the pigment around. I do this in the early stages to get rid of some of the grain of the paper.
You can also use scotch tape to remove pigment. You may want to do that to get rid of mistakes or to create shapes or highlights.
One more thing that you can do is use a lighter color to add subtle highlights on top.
I think the grass above is okay, but I don’t anticipate drawing grass with colored pencils anytime soon. It’s more time-consuming, and I only have a certain amount of patience.
That said, I have seen artists create amazing-looking grass with colored pencils, so if you want to achieve that I’m sure you can.
5. Brain Tips
Lastly, I’ll give you some mindset tips I have to tell myself frequently when drawing grass. After all, art is a mental game.
Remember it’s just a background. This is something I have to make myself think about because I am detail-oriented. No one needs to see every blade of grass. You only need to provide a good illusion of the grass.
Take a lot of breaks. You may be staring at it too much, too closely. It probably looks fine. Go and take a walk or do a chore. When you come back to it and look at it from a distance it’s probably fine.
Tell yourself it’s good enough for now and that you can always work on it later. Sometimes when I do this I don’t go back to work on it again, because it’s just fine. Similar to #2. This also prevents you from overworking it.
Pretend it’s meditative to trick yourself into enjoying it. If you can figure out how to make it look good, put on a good TV show, podcast, or Audiobook and let it be meditative.
Chip away at it. Even if you only do an hour a day, you will eventually be out of the weeds, so to speak :)
Conclusion
I know it is hard to draw grass with colored pencils or pastels. It is time-consuming, and it can be frustrating to make it look realistic. I hope that by reading these tips and seeing my examples I can help you figure out how to draw some grass if you want to. I hear from people who say they are scared of drawing a background. I know it can be intimidating, but I say dive in. As long as you get started, you will be progressing. I promise!
I’d love to hear your thoughts below! Also, feel free to let me know if you want me to tackle a specific topic in a future blog. I love learning and sharing what I find out with other artists.